.png) You'll start by defining a
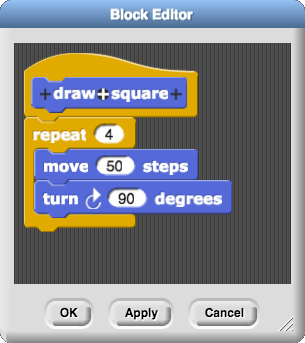
You'll start by defining a draw square block with a familiar script (shown right). Then, you'll define draw triangle, then draw house, and finally draw row of houses.
So far, you've used blocks that already existed. Now, you'll learn to build your own blocks and use them to make other blocks.
.png) You'll start by defining a
You'll start by defining a draw square block with a familiar script (shown right). Then, you'll define draw triangle, then draw house, and finally draw row of houses.

 near the bottom of the Variables palette.
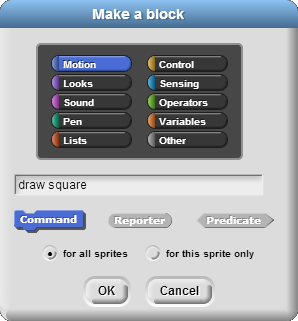
draw square block: right-click (or, on a Mac, control-click) on the gray background of the scripting area and choose "make a block..."
draw square block, using it the same way you've used other blocks. Fix your code if necessary.
draw square block.)

when flag clicked, when space key pressed, etc. This hat block says, "when the draw square block is used." (Don't worry about the + signs for the moment; they just let you add more words or inputs.)Practice building blocks.

draw triangle block that draws an equilateral triangle with the same side length as the square you just drew (50).
(Don't click this sentence unless you've been working on this for ten solid minutes and need a hint.)
draw house block that uses your draw square and draw triangle blocks together to draw a "house" shape: a square with a triangular shaped roof sitting on top. (You might have to do some debugging to get the two shapes to connect properly.)draw row of houses block that draws a row of attached houses, each new one to the right of the previous, until the sprite moves too close to the right edge of the screen. For that, you will need repeat until..png)
